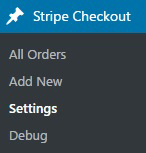
Once you have installed the WP Stripe Checkout plugin you will be able to access the settings by navigating to “Stripe Checkout -> Settings”.
General Settings
In the general settings area, you will need to configure some options related to your Stripe merchant account.
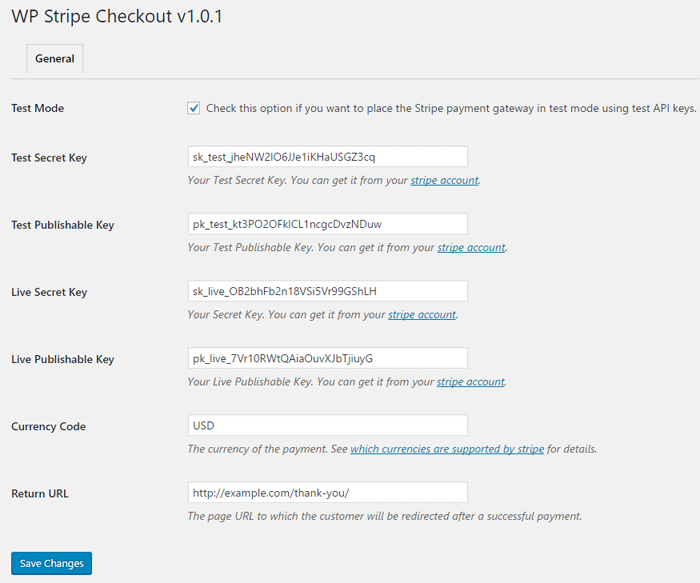
Click on the “Save Changes” button when you are done.
Email Settings
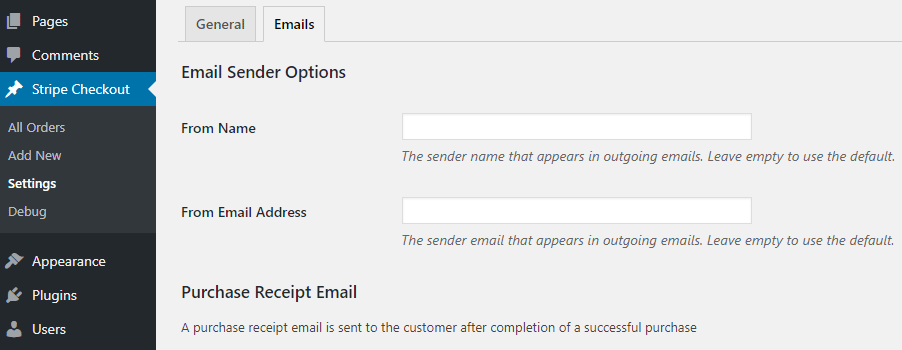
In the email settings area, you can choose to configure some email related settings.
Email Sender Options
In this section, you can specify a From Name and From Email Address that will be used by the plugin when sending an email. You can leave them empty to use the default.
Purchase Receipt Email
WP Stripe checkout plugin allows you to send a purchase receipt email to the customer after completion of a successful purchase. By default, this feature is disabled. In order to use this feature, you need to enable it in the settings.
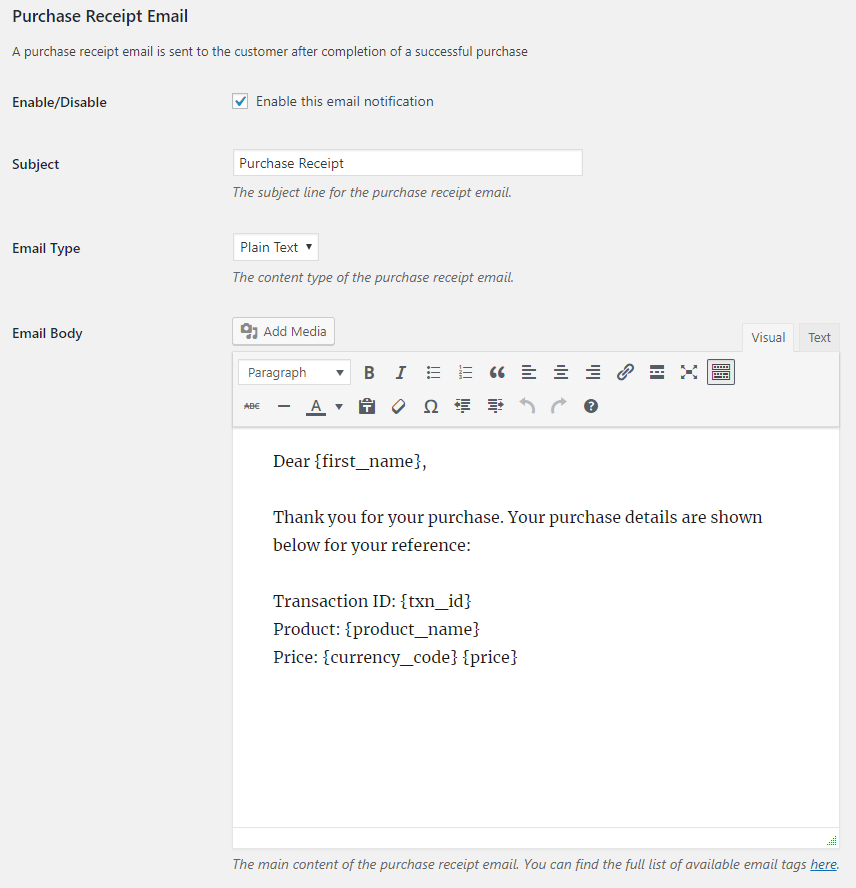
You can customize the following options in the purchase receipt email,
Purchase Receipt Email Subject: The subject line for the purchase receipt email.
Purchase Receipt Email Type: The content type of the purchase receipt email (Plain Text/HTML).
Purchase Receipt Email Body: The main content of the purchase receipt email. You can use various tags in the email body to dynamically change its content when it is sent.
Sale Notification Email
WP Stripe checkout plugin can send a sale notification email to your chosen recipient after completion of a successful purchase. By default, this feature is disabled. In order to use this feature, you need to enable it in the settings.
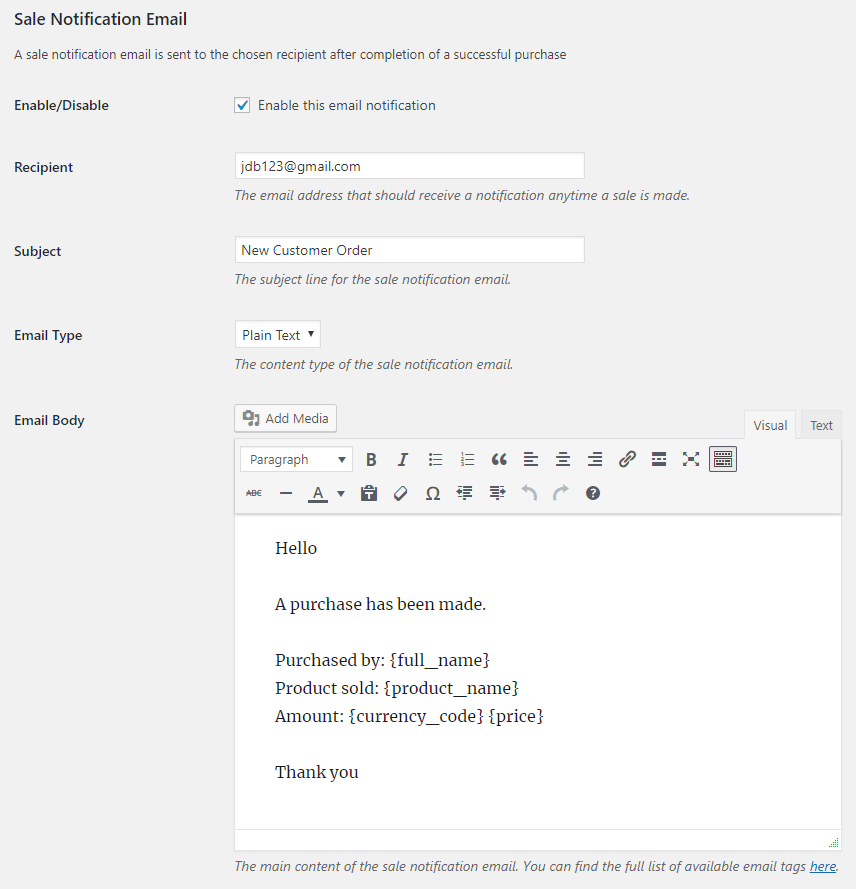
You can customize the following options in the sale notification email,
Sale Notification Email Recipient: The email address that should receive a notification anytime a sale is made.
Sale Notification Email Subject: The subject line for the sale notification email.
Sale Notification Email Type: The content type of the sale notification email (Plain Text/HTML).
Sale Notification Email Body: The main content of the sale notification email. You can use various tags in the email body to dynamically change its content when it is sent.
Email Tags
The following email tags can be used in the email body to dynamically change its content when an email is sent,
{first_name} – The buyer’s first name.
{last_name} – The buyer’s last name.
{full_name} – The buyer’s full name.
{customer_email} – The buyer’s email address.
{txn_id} – The unique transaction ID for this purchase.
{product_name} – The name of the product purchased.
{product_id} – The ID of the product.
{price_id} – The price ID of the product.
{currency_code} – The currency code used to make the payment.
{price} – The price of the product.
{quantity} – The purchased quantity of the product.
{amount_total} – The total amount of the purchase.
{amount_shipping} – The shipping amount of the purchase.
{billing_name} – The buyer’s billing name.
{billing_address} – The buyer’s billing address.
{shipping_name} – The buyer’s shipping name.
{shipping_address} – The buyer’s shipping address.
{wp_user_id} – The ID of the WordPress user. (WP User Tracking add-on is required)
Stripe Webhook Setup
Go to Developers > Webhooks > Add endpoint from your account dashboard and insert the URL shown in the plugin settings.
Select this event – checkout.session.completed and click Add endpoint. This is where Stripe will send a notification after a checkout payment is successful. Optionally you can select the invoice.payment_succeeded event if you would like to receive notifications for subscription renewal payments.
You will also need to add the checkout.session.async_payment_succeeded and checkout.session.async_payment_failed events if you plan to use a payment method where there can be a delay in payment confirmation. For example:
- Bacs Direct Debit
- Boleto
- Canadian pre-authorised debits
- OXXO
- SEPA Direct Debit
- SOFORT
- ACH Direct Debit