Gmail Mailer is the easiest way to send
Requirements
- A self-hosted WordPress site running on a WordPress Optimized Environment.
- One of port 587, 465 or 25 needs to be open. If they are all blocked Gmail Mailer may not be able to send an email. In that case, they should advise which port you can use to connect to the remote Gmail SMTP server.
- Your Web host needs to allow communication with the external Gmail SMTP server.
Gmail Mailer Installation
You can install the Gmail Mailer plugin like any other WordPress plugin.
Option 1 (Quick & Easy install)
- Go to Plugins->Add New from your WordPress admin dashboard
- Search for Gmail Mailer
- Click Install once you have found it
Option 2 (Manual install)
- Download the zip version of the plugin
- Go to Plugins->Add New
- Click Upload Plugin
- Select the zip file on your computer
- Install it
Option 3 (FTP install)
- Download the zip version of the plugin
- Extract it on your computer
- Connect to your site via FTP
- Browse to “/wp-content/uploads/plugins/” directory
- Upload the folder that contains the main plugin files
Gmail Mailer Settings
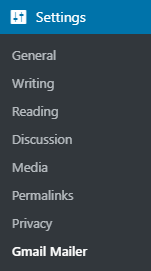
You will need to configure your Gmail account related information before it can take control of your outgoing emails. To access the settings menu go to “Settings->Gmail Mailer” from your admin dashboard.

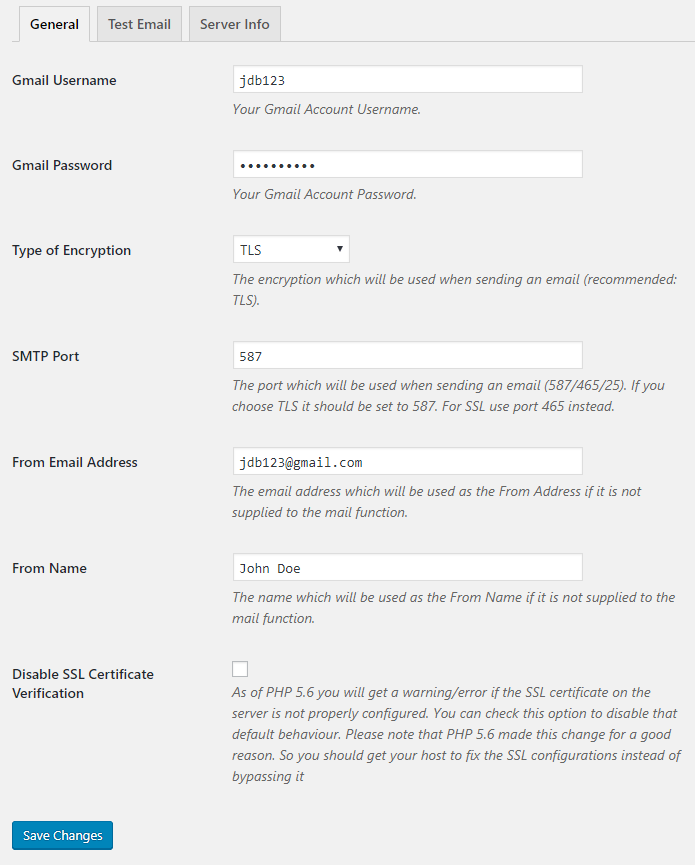
The settings menu comes with three separate tabs – General Settings, Test Email & Server Info.
General Settings

Gmail Username
The username that you use to log in to your Gmail account (e.g. jdb123 where the full email is jdb123@gmail.com).
Gmail Password
The password that you use to log in to your Gmail account.
Type of Encryption
The encryption which will be used for sending all outgoing emails (Supported values: TLS/SSL/No Encryption. TLS is recommended).
SMTP Port
The port which will be used when sending an email (587/465/25). If you choose TLS the port should be set to 587. For SSL use port 465 instead.
From Email Address
The email address which is be used as the From Address if it is not supplied to the mail function.
From Name
The name which will be used as the From Name if it is not supplied to the mail function.
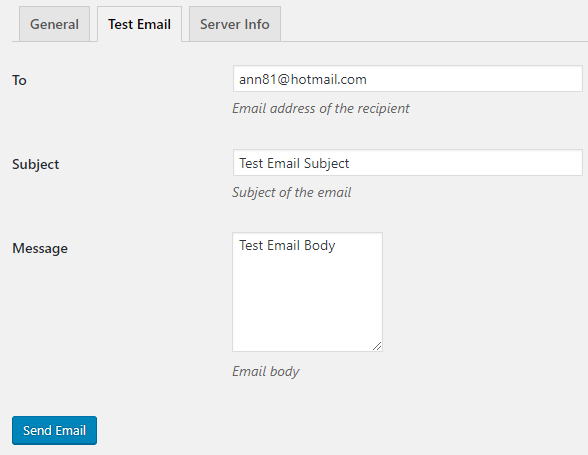
Test Email
“Test Email” menu allows you to test the functionality of the plugin after you have configured everything.

Server Info
“Server Info” menu displays some technical information regarding your server. This is very useful for troubleshooting.
Troubleshooting
1.For security reasons, Gmail now blocks any incoming connection to its SMTP server. In order to make a connection to the Gmail SMTP server and send email, you will also need to allow less secure apps in your account.
2.When you are sending an email for the first time via SMTP, you might get this SMTP Error: “Could not authenticate“.
In order to fix this issue login to your Gmail account first. You should see a security warning from Gmail upon login – “Your account has been hacked” or “Somebody stole your password”. As soon as you confirm that it was you who tried to login (Just click on the link that shows up in that message), the plugin should be able to connect to the Gmail SMTP server.
If you have any questions feel free to share it in the comment section.