Stripe checkout plugin enables Stripe payment gateway on your WordPress site. It seamlessly integrates Stripe checkout functionality into your site and allows you to collect credit and debit card payments. Stripe checkout plugin offers SCA-ready (Strong Customer Authentication) checkout option with mobile-ready experience for your customers.
Features
- Accept payments on a Stripe-hosted payment page
- Accept Stripe one-time payments
- Validate cards in real-time with built-in error messaging
- Accept Stripe recurring payments
- Multiple payment methods for international payments
- Accept donations via Stripe
- Customize Stripe payment buttons
- PCI compliant and SCA-ready (strong customer authentication)
- Send email receipts to customers automatically
- Accept Apple Pay payments
- Accept Google Pay payments
- Accept Alipay payments
- Accept WeChat Pay payments
- Accept Bancontact payments
- Accept EPS payments
- Accept giropay payments
- Accept iDEAL payments
- Accept Przelewy24 payments
- Accept Sofort payments
- Accept Afterpay/Clearpay payments
- Accept Boleto payments
- Accept OXXO payments
- Accept ACH Direct Debit payments
- Accept Bacs Direct Debit payments
- Accept BECS Debit payments
- Accept Canadian pre-authorised debit (PAD) payments
- Accept SEPA Direct Debit payments
- Allow billing address collection at checkout
- Allow shipping address collection at checkout
- Allow shipping charges at checkout
- Allow phone number collection at checkout
- Allow user redeemable promotion codes at checkout
- Enable VAT/tax ID collection at checkout
Stripe Checkout Plugin Installation
- Login to your WordPress admin dashboard
- Go to Plugins->Add New Plugin
- Enter WP Stripe Checkout naa986 in the search box
- Once you find the plugin hit the install button
The plugin can also be downloaded from here: https://wordpress.org/plugins/wp-stripe-checkout/. For a manual installation go to Plugins > Add New Plugin > Upload Plugin and select the zip file that you downloaded.
Stripe Checkout Plugin Configuration
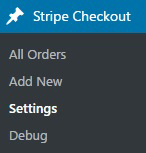
Once you have installed the plugin you will be able to access the settings by navigating to “Stripe Checkout -> Settings”.
General Settings
In the general settings area, you will need to configure some options related to your Stripe merchant account.
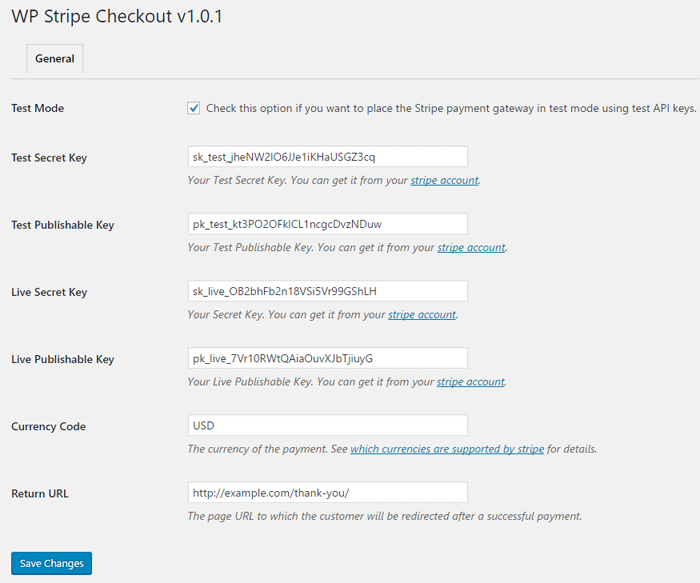
Click on the “Save Changes” button when you are done.
Email Settings
In the email settings area, you can choose to configure some email related settings.
Email Sender Options
In this section, you can specify a From Name and From Email Address that will be used by the plugin when sending an email. You can leave them empty to use the default.
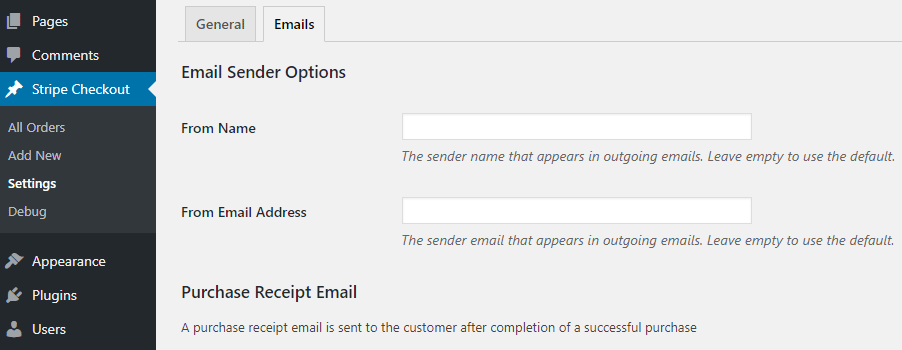
Purchase Receipt Email
WP Stripe checkout plugin allows you to send a purchase receipt email to the customer after completion of a successful purchase. By default, this feature is disabled. In order to use this feature, you need to enable it in the settings.

You can customize the following options in the purchase receipt email,
Purchase Receipt Email Subject: The subject line for the purchase receipt email.
Purchase Receipt Email Type: The content type of the purchase receipt email (Plain Text/HTML).
Purchase Receipt Email Body: The main content of the purchase receipt email. You can use various tags in the email body to dynamically change its content when it is sent.
Sale Notification Email
WP Stripe checkout plugin can send a sale notification email to your chosen recipient after completion of a successful purchase. By default, this feature is disabled. In order to use this feature, you need to enable it in the settings.
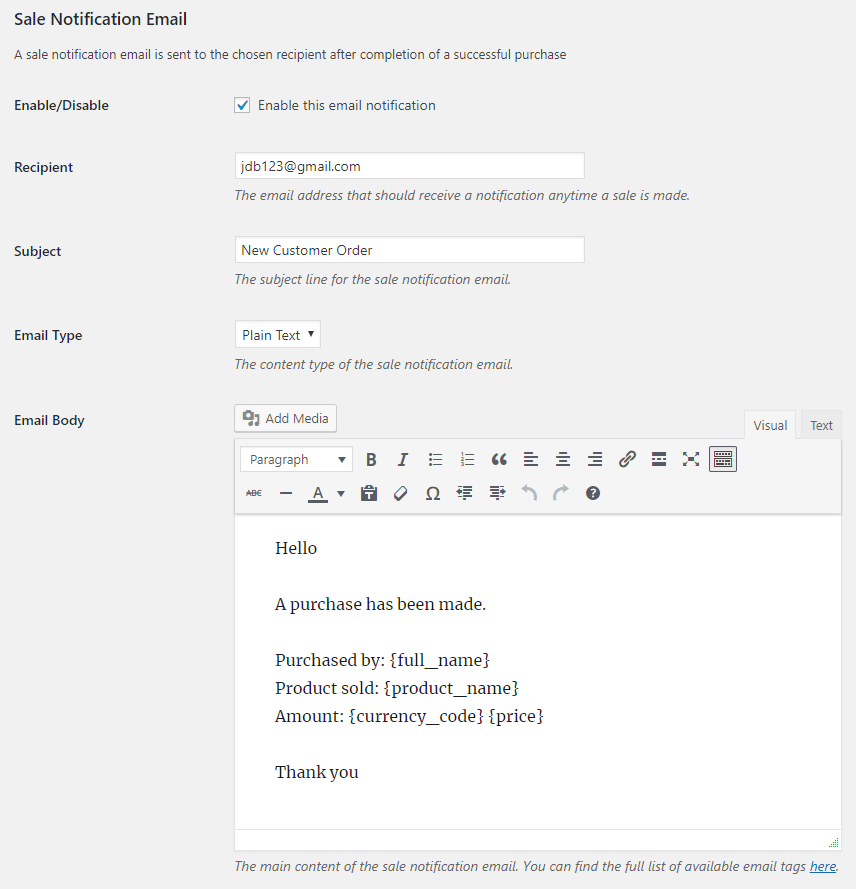
You can customize the following options in the sale notification email,
Sale Notification Email Recipient: The email address that should receive a notification anytime a sale is made.
Sale Notification Email Subject: The subject line for the sale notification email.
Sale Notification Email Type: The content type of the sale notification email (Plain Text/HTML).
Sale Notification Email Body: The main content of the sale notification email. You can use various tags in the email body to dynamically change its content when it is sent.
Email Tags
The following email tags can be used in the email body to dynamically change its content when an email is sent,
{first_name} – The buyer’s first name.
{last_name} – The buyer’s last name.
{full_name} – The buyer’s full name.
{customer_email} – The buyer’s email address.
{txn_id} – The unique transaction ID for this purchase.
{product_name} – The name of the product purchased.
{product_id} – The ID of the product.
{price_id} – The price ID of the product.
{currency_code} – The currency code used to make the payment.
{price} – The price of the product.
{quantity} – The purchased quantity of the product.
{amount_total} – The total amount of the purchase.
{amount_shipping} – The shipping amount of the purchase.
{billing_name} – The buyer’s billing name.
{billing_address} – The buyer’s billing address.
{shipping_name} – The buyer’s shipping name.
{shipping_address} – The buyer’s shipping address.
{wp_user_id} – The ID of the WordPress user. (WP User Tracking add-on is required)
Stripe Webhook Setup
Go to Developers > Webhooks > Add endpoint from your account dashboard and insert the URL shown in the plugin settings.
Select this event – checkout.session.completed and click Add endpoint. This is where Stripe will send a notification after a checkout payment is successful.
You will also need to add the checkout.session.async_payment_succeeded and checkout.session.async_payment_failed events if you plan to use a payment method where there can be a delay in payment confirmation. For example:
- Bacs Direct Debit
- Boleto
- Canadian pre-authorised debits
- OXXO
- SEPA Direct Debit
- SOFORT
- ACH Direct Debit
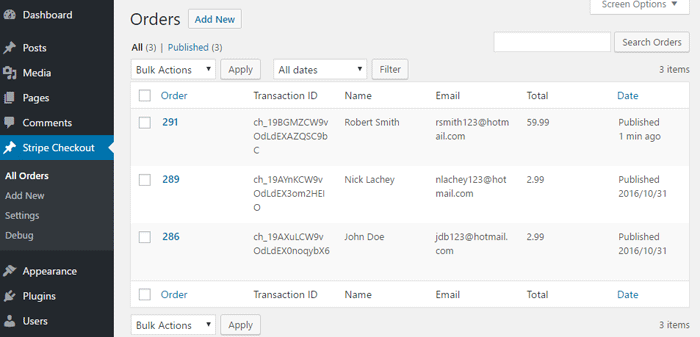
Stripe Orders
When you receive a new order you will be able to view it in the orders menu.
How to Use Stripe Checkout
The easiest way to get started is to add the following shortcode to a post/page.
[wp_stripe_checkout_session name="My Product" price="2.99"]
The shortcode will create a one-time payment button. Replace the value of name with your product name and price with the actual product price.

Shortcode Parameters
wp_stripe_checkout_session shortcode currently supports the following parameters:
description
The description of the product (optional). No description is set by default.
[wp_stripe_checkout_session name="My Product" price="2.99" description="My Product Description"]
button_text
The text displayed inside the button (optional). The default is “Buy Now”.
[wp_stripe_checkout_session name="My Product" price="2.99" button_text="Pay Now"]
button_image
If you want a custom image to act as the button you can use the button_image parameter instead (optional). The default is a plan button with the text “Buy Now”.
[wp_stripe_checkout_session name="My Product" price="2.99" button_image="https://example.com/wp-content/uploads/pay-now-button.png"]
success_url
The URL to which Stripe will redirect upon completion of a successful payment (optional). The default is the Return URL specified in the settings.
[wp_stripe_checkout_session name="My Product" price="2.99" success_url="https://example.com/success"]
cancel_url
The URL to which Stripe will redirect when a payment is canceled (optional). The default is the home URL for your site.
[wp_stripe_checkout_session name="My Product" price="2.99" cancel_url="https://example.com/cancel"]
billing_address
You can specify whether Stripe should collect the customer’s billing address (optional). By default this parameter is not set which means Stripe will only attempt to collect the billing address when necessary.
[wp_stripe_checkout_session name="My Product" price="2.99" billing_address="required"]
You can also set this parameter to “auto” which is equivalent to empty at the moment.
phone_number_collection
You can specify whether Stripe should collect the customer’s phone number (optional). By default this parameter is not set.
[wp_stripe_checkout_session name="My Product" price="2.99" phone_number_collection="true"]
When phone number collection is enabled, a required phone number field is added to the payment form.
allow_promotion_codes
You can specify whether Stripe should allow user redeemable promotion codes at checkout (optional). By default this parameter is not set.
[wp_stripe_checkout_session name="My Product" price="2.99" allow_promotion_codes="true"]
tax_id_collection
You can specify whether Stripe should collect the customer’s VAT/tax ID (optional). By default this parameter is not set.
[wp_stripe_checkout_session name="My Product" price="2.99" tax_id_collection="true"]
When tax ID collection is enabled, a tax ID collection form will be automatically shown on the payment page depending on your customer’s location.
consent_collection_promotions
You can specify whether Stripe should automatically collect consent from customers for promotions (optional). This gives you the permission to send promotional emails which are often sent to inform customers of new products and to share coupons and discounts. By default this parameter is not set.
[wp_stripe_checkout_session name="My Product" price="2.99" consent_collection_promotions="auto"]
prefill_wp_email
You can specify whether the current user’s email address should be automatically passed to Stripe (optional). By default this parameter is not set.
[wp_stripe_checkout_session name="My Product" price="2.99" prefill_wp_email="true"]
This requires the user to be logged in to WordPress.
class
Custom CSS class for the button (optional).
[wp_stripe_checkout_session name="My Product" price="2.99" class="btn"]
Multiple CSS classes can be added in a space-delimited format.
[wp_stripe_checkout_session name="My Product" price="2.99" class="btn btn2 btn3"]
target
You can specify whether the button should open in a new tab (optional). By default this parameter is not set.
[wp_stripe_checkout_session name="My Product" price="2.99" target="_blank"]
WP Stripe Checkout Add-ons
WP Stripe Checkout plugin comes with various add-ons that you can use to enhance its functionality on your website.
Variable Price
Variable Price addon lets customers set the amount they will pay. It can also be used for accepting donation payments via the Stripe payment gateway.
Variable Quantity
Variable Quantity add-on lets customers set the quantity they will purchase. This is done by creating adjustable product quantity fields for Stripe payment buttons.
Submit Type
Submit Type add-on allows you to customize the type of the submit button that appears on the Stripe payment page.
Terms of Service
Terms of Service add-on allows you to show a terms of service checkbox on the Stripe payment page.
Variable Currency
Variable Currency add-on lets customers pay in their preferred currency. It can be great for accepting donation payments via the Stripe payment gateway.
WP User Tracking
WP User Tracking add-on tracks payments made by logged-in WordPress users on your website.
WP User Only Button
WP User Only Button add-on allows only logged-in WordPress users to view payment buttons.
How to Use Stripe Payment Links
Payment link is a Stripe feature that allows you to sell online easily. You can create payment links with a few clicks and share easily with your customers to accept payments. When someone follows a payment link, they will go straight to the Stripe payment page. This makes the checkout process faster and easier for customers without you having to worry about coding.
If you wish to integrate Stripe payments links with our plugin you can follow this method.
1. Create a Payment Link
Log in to your Stripe account dashboard and navigate to the Payment links page (Payments > Payment links). Select an existing payment link or create a new one (by selecting an existing product or adding a new one).
2. Use the Payment Link in a Shortcode
Add the following shortcode to a post/page to create a button with the payment link.
[wp_stripe_checkout_payment_link url="https://buy.stripe.com/live_6gPE4jw7dMbUKdd3345"]
Replace the value of url with your payment link url.
Shortcode Parameters
Stripe payment link shortcode currently supports the following parameters:
button_text
The text displayed inside the button (optional). The default is “Buy Now”.
[wp_stripe_checkout_payment_link url="https://buy.stripe.com/live_6gPE4jw7dMbUKdd3345" button_text="Pay Now"]
button_image
If you want a custom image to act as the button you can use the button_image parameter instead (optional). The default is a plan button with the text “Buy Now”.
[wp_stripe_checkout_payment_link url="https://buy.stripe.com/live_6gPE4jw7dMbUKdd3345" button_image="https://example.com/wp-content/uploads/pay-now-button.png"]
target
You can specify whether the payment link button should open in a new tab (optional). By default this parameter is not set.
[wp_stripe_checkout_payment_link url="https://buy.stripe.com/live_6gPE4jw7dMbUKdd3345" target="_blank"]
class
Custom CSS class for the button (optional).
[wp_stripe_checkout_payment_link url="https://buy.stripe.com/live_6gPE4jw7dMbUKdd3345" class="btn"]
Multiple CSS classes can be added in a space-delimited format.
[wp_stripe_checkout_payment_link url="https://buy.stripe.com/live_6gPE4jw7dMbUKdd3345" class="btn btn2 btn3"]
Custom Button/Link Integration
If you have a custom button/link that you wish to integrate with our plugin and Stripe payment links, you can do so by adding “?client_reference_id=wpsc_payment_link” to the original payment link url.
https://buy.stripe.com/live_6gPE4jw7dMbUKdd3345?client_reference_id=wpsc_payment_link
Please note that our add-ons will not work with this custom button/link integration.
WP Stripe Checkout Add-ons for Payment link Buttons
The payment link integration offers add-ons that you can use to enhance its functionality on your website.
Payment Link Email
Payment Link Email add-on can collect email addresses from buyers and prefill on the Stripe payment page.
WP User Tracking
WP User Tracking add-on tracks payments made by logged-in WordPress users on your website.
WP User Only Button
WP User Only Button add-on allows only logged-in WordPress users to view payment buttons.
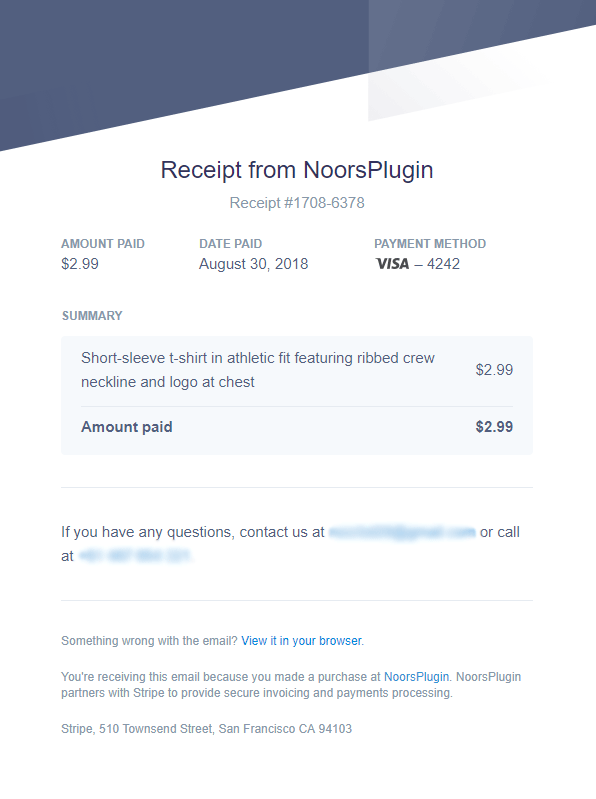
Stripe Email Receipt
Stripe can automatically send a receipt to your customer via email after completion of a purchase. All that is required for this option is the email address of the customer at checkout. The plugin will collect the email address entered in the simple pay form and notify Stripe so a receipt is automatically sent to the customer upon purchase.
Stripe Customer Portal
Stripe customer portal is a Stripe-hosted portal that allows your customers to manage their subscriptions and billing details themselves. The easiest way for your customers to access this portal is through a customer portal link that you can generate from your Stripe account dashboard.
How to Activate Stripe Customer Portal
1. Go to Settings > Billing > Customer portal from your Stripe account dashboard.

2. Click Activate link.

You can add the customer portal link to your website or send it to your customers via email.